Building a Real-Time Notification System with SignalR and Azure Functions

1. Introduction
In this article, we'll build a real-time notification system for web applications using SignalR and Azure Functions as an alternative to solutions like Pusher.
2. What We Are Going to Build
In my mission at Econocom, I faced the challenge of handling long asynchronous requests, such as generating a PDF file of a contract. I wanted to avoid keeping users waiting and instead, inform them instantly about the progress of their request. Upon completion, I would send an in-app notification to let them know the file was ready.
To accomplish this, I needed a solution that enabled sending message notifications to subscribed users without requiring a page refresh. Although Socket.IO was an option, I chose Azure SignalR for its seamless integration with the Azure ecosystem, automatic scaling capabilities, and powerful real-time communication features compatible with our Active Directory.
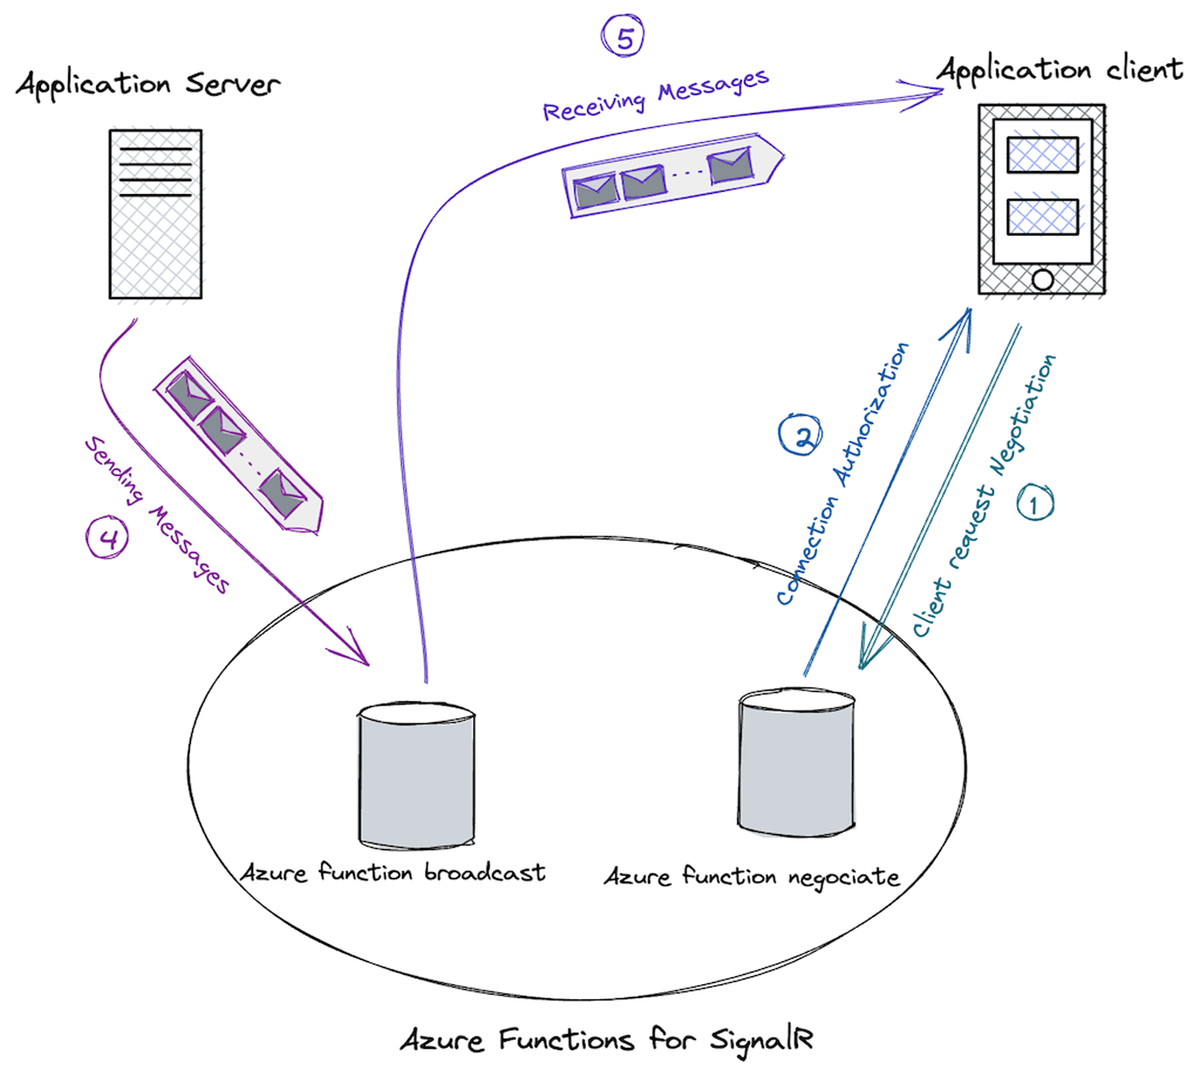
3. How It Works Behind the Scenes
4. Creating the SignalR Service
In this section, we will create the SignalR service that will be responsible for managing real-time connections and communication between clients and our backend.
To set up the SignalR Service on Azure, follow these steps:
- Go to your Azure portal.
- Search for 'SignalR Service'.
- Create a new one, and make sure to select the service mode as 'Serverless'. See the following picture for reference:

5. Server-Side Implementation
5.1 Creating the Azure Functions APP
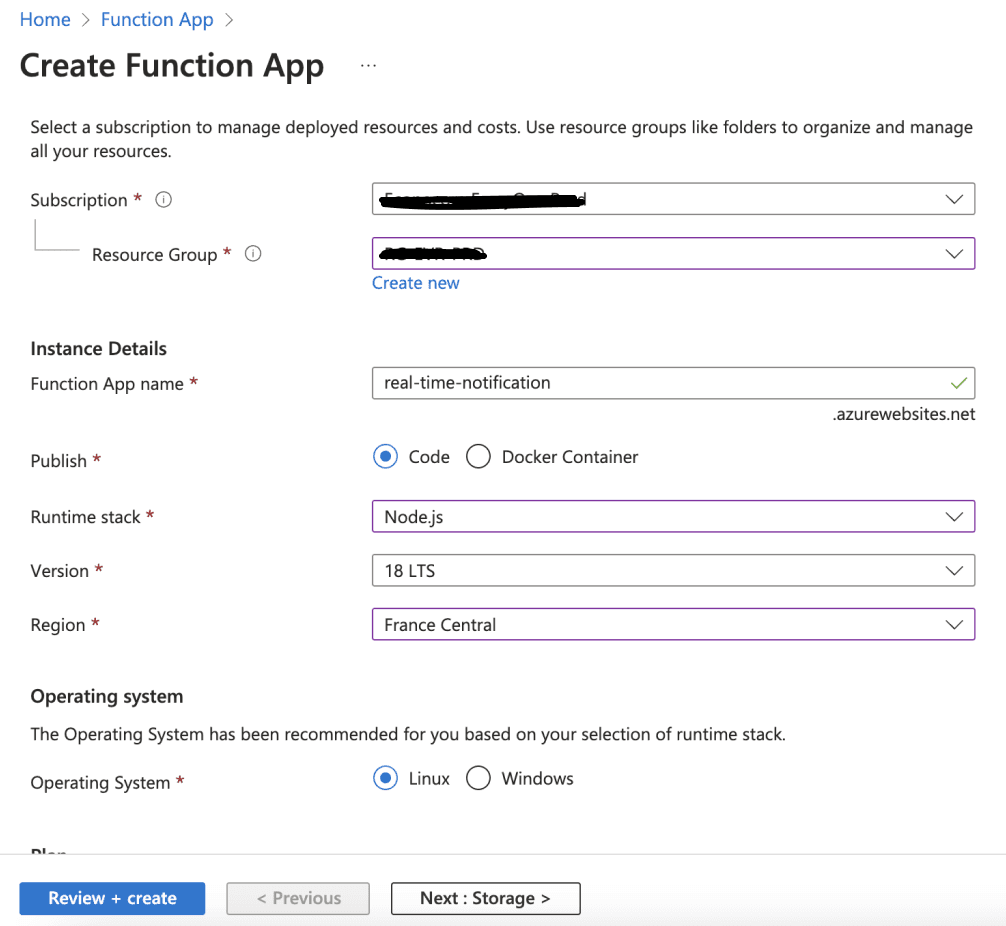
For this project, I chose to create the Azure Functions using the Azure Portal. I will use Node.js version 18 LTS and Linux as the runtime, as shown in the picture below:
After creating the Azure Functions App on the portal, we will need to initialize the project locally to create the functions. To do that, we must ensure that we have the Azure CLI installed, and Azure Functions Core Tools:
To install the Azure CLI, follow the instructions on the official documentation. To install the Azure Functions Core Tools, run the following command:
npm install -g azure-functions-core-tools
After installing the required tools, log in to your Azure account using the following command:
az login
So let's create our project folder and initialize the function.
mkdir real-time-notification && cd real-time-notification && func init
Choose Node for worker runtime and JavaScript
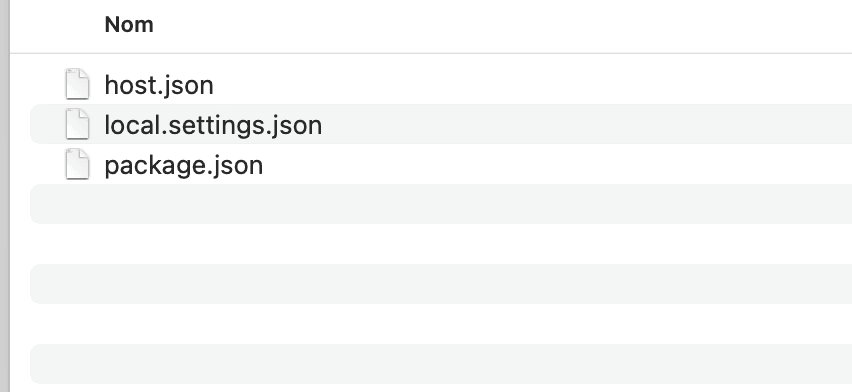
You will have the fallowing files created:
Now ensure that our settings locally match the settings on the Azure portal. To do this, run the following command:
func azure functionapp fetch-app-settings real-time-notification

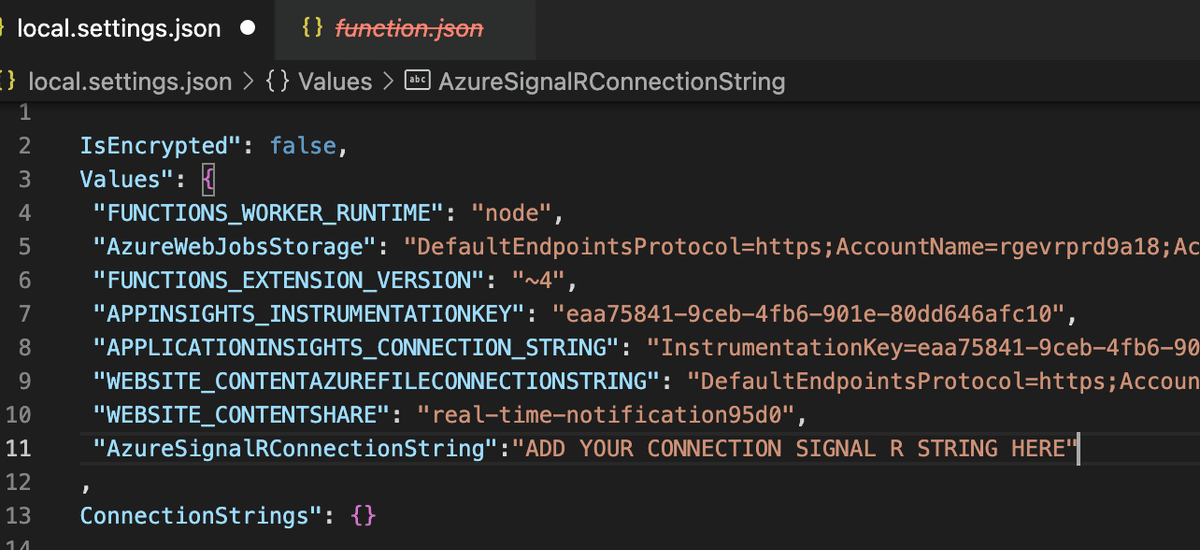
Finally, add the SignalR connection string to the local settings. To do this, go to the Azure portal, copy the connection string from the SignalR service created earlier, and add it to the local settings file:
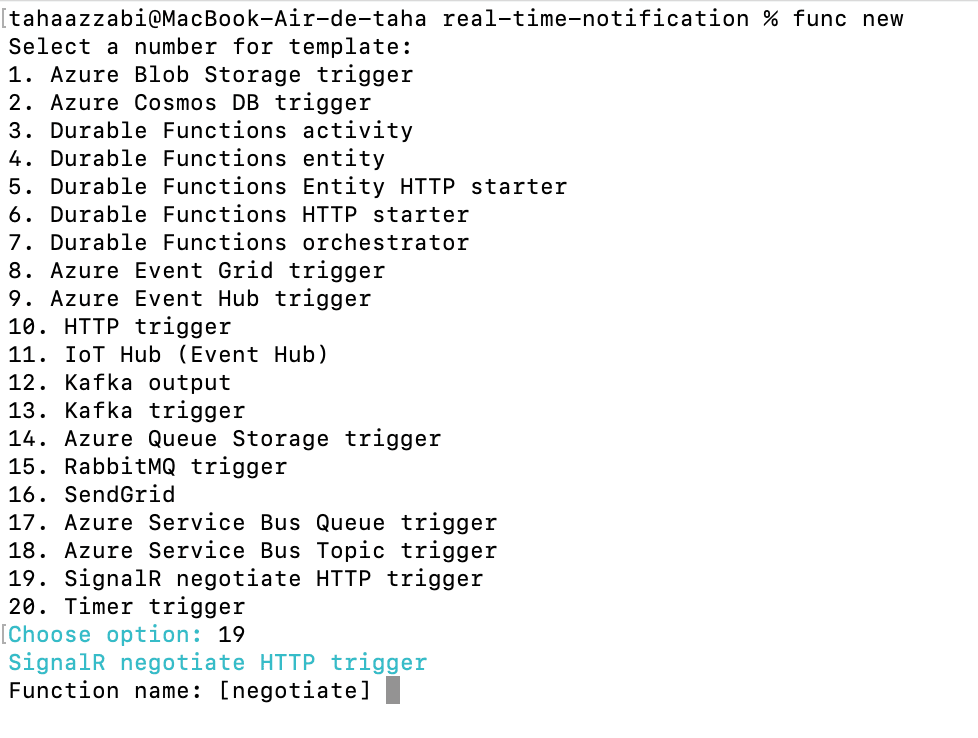
5.1.1 Creating the Negotiate Function
Next, I will create the first function locally, called negotiate. This function serves as the gateway for clients, enabling them to call it and obtain the URL and access token required for connecting to the channel.
Open the terminal in the project folder and run the following command:
func new
Choose SignalR negotiate HTTP trigger options